Adding personnel
The HeliCrewManager system is built on making it as easy as possible to manage and roster crew members - individuals and groups of them.
It can do this through storing user accounts of every relevant crew member of your operation, tracking their personal and contact information, important qualifications they need, individual recency items and a record of activities (like flights) and renewals. Using this data, and grouping them smartly with other users of the same type, means we can efficiently schedule and communicate for a wide range of purposes.
Of course, in order to do this we need some user data in your HCM account - so let's get started.
Within these guides you will be told to navigate to specific buttons in HCM. If a step includes a phrase that looks like this: Create New User, this will be the exact text shown on the button you're looking for. Elsewhere, in cases such as a button having no text, an annotated screengrab may be shown instead.
Populating your default account
By default, your new HCM account should have a single user account set up for you, which the login details we have provided (a username and a password) will sign you into. This account will most likely just include your name and email address - and of course can be edited just like any other account at any time.
The first thing you want to do is head to the Inspect Crew (1) page in the menu sidebar, where all your controls will be accessible from.
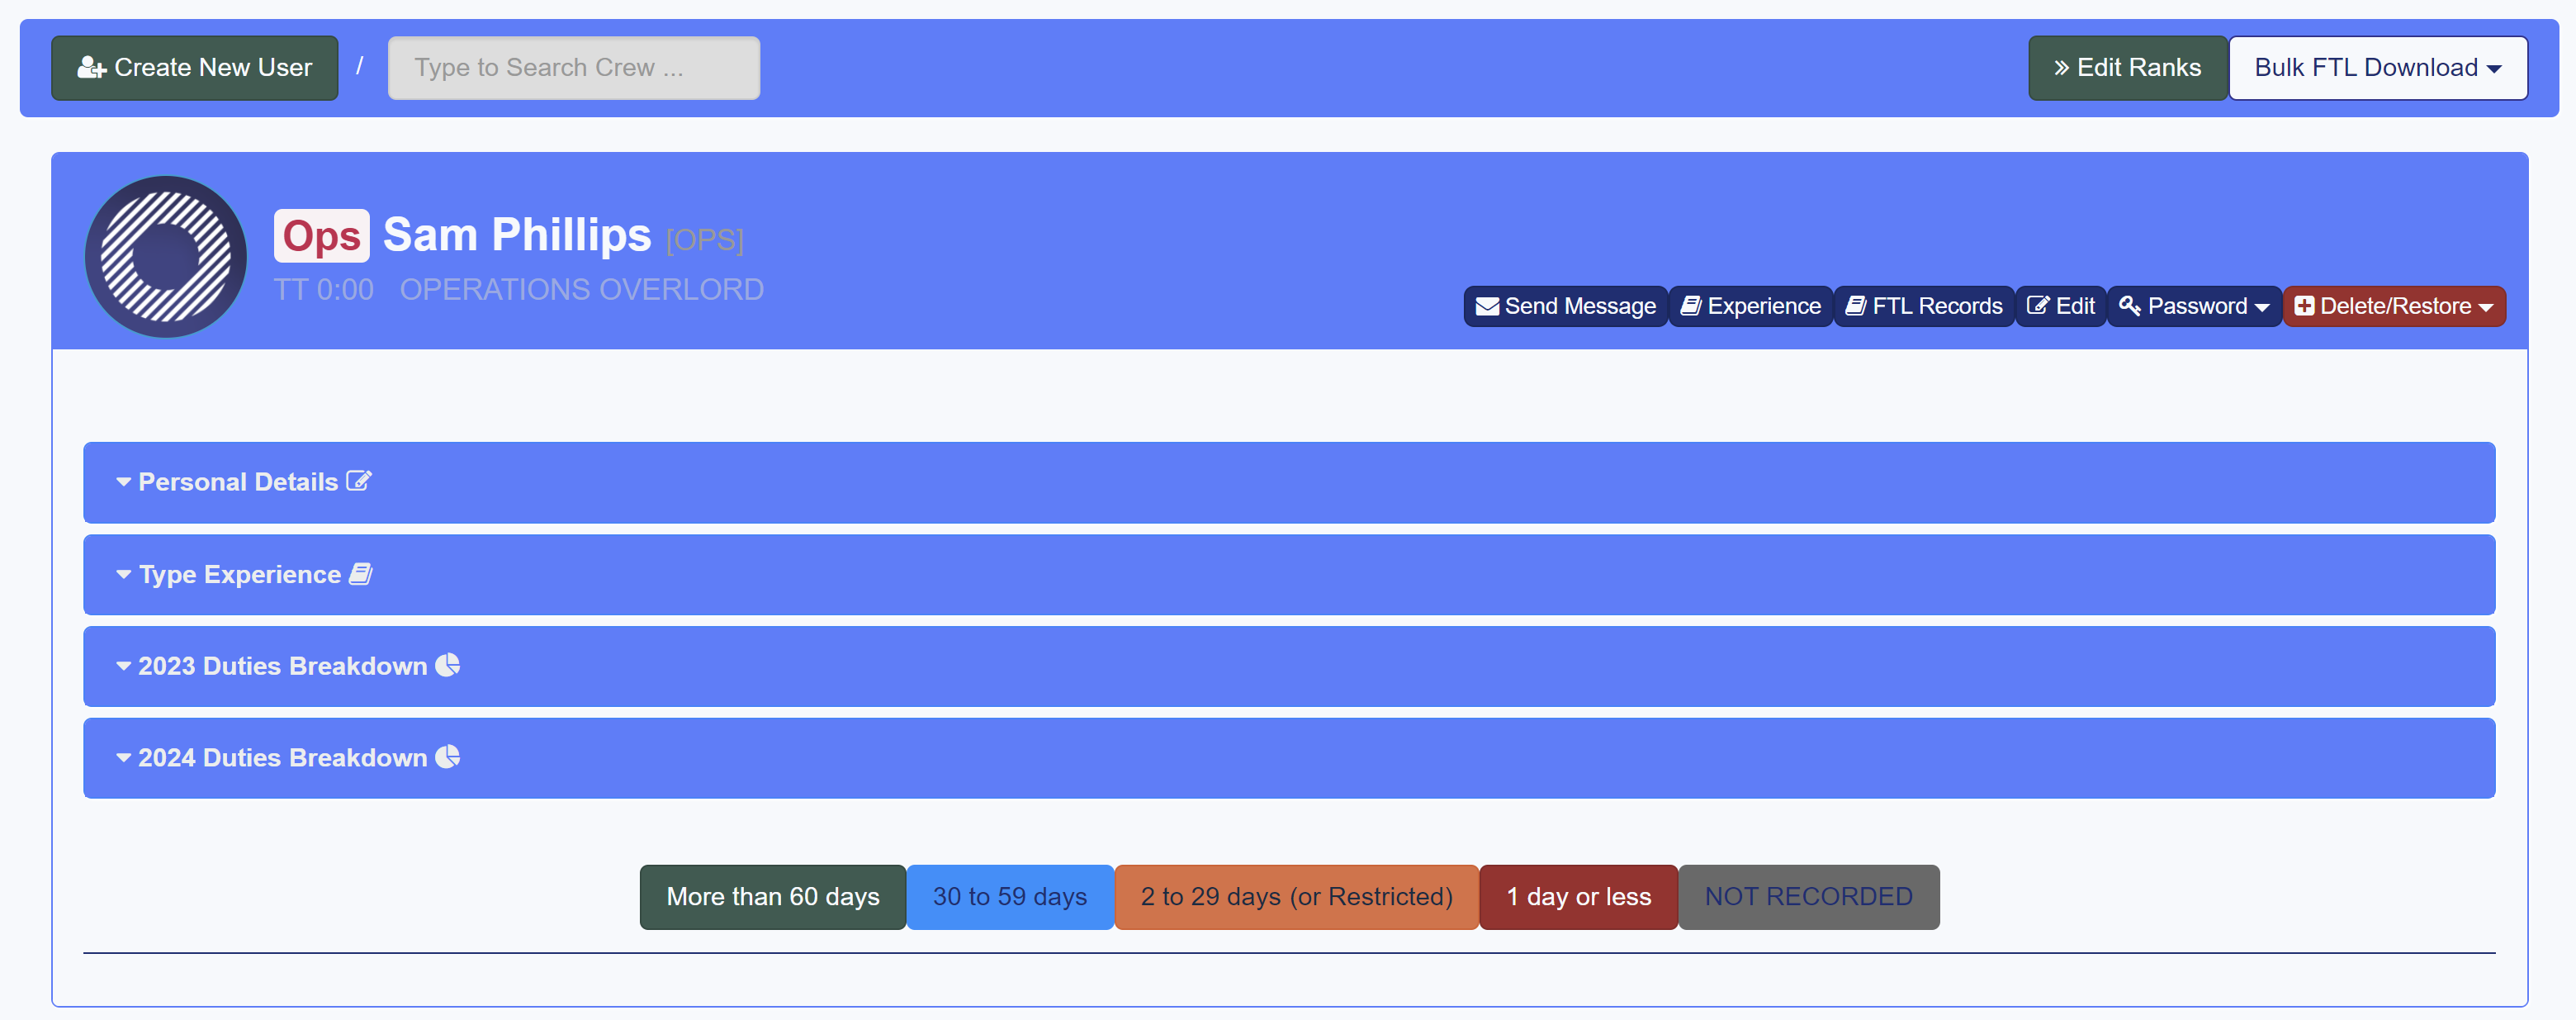
Doing this will bring you to your fresh user account, and a hotbar of controls to manage the users associated with your account. This should appear like the image below (but most likely with your name instead).

Unless you've specified and requested beforehand, this account will be missing all the user information you'll be needing later. A good first step to get familiar with the process is to input all your details into your empty account.
To do this, let's take a look at the controls you have for a specific user.
Within the header portion of the user page you have a toolbar of admin-level operations, including Send Message, Experience, FTL Records, Edit, Password and Delete/Restore.
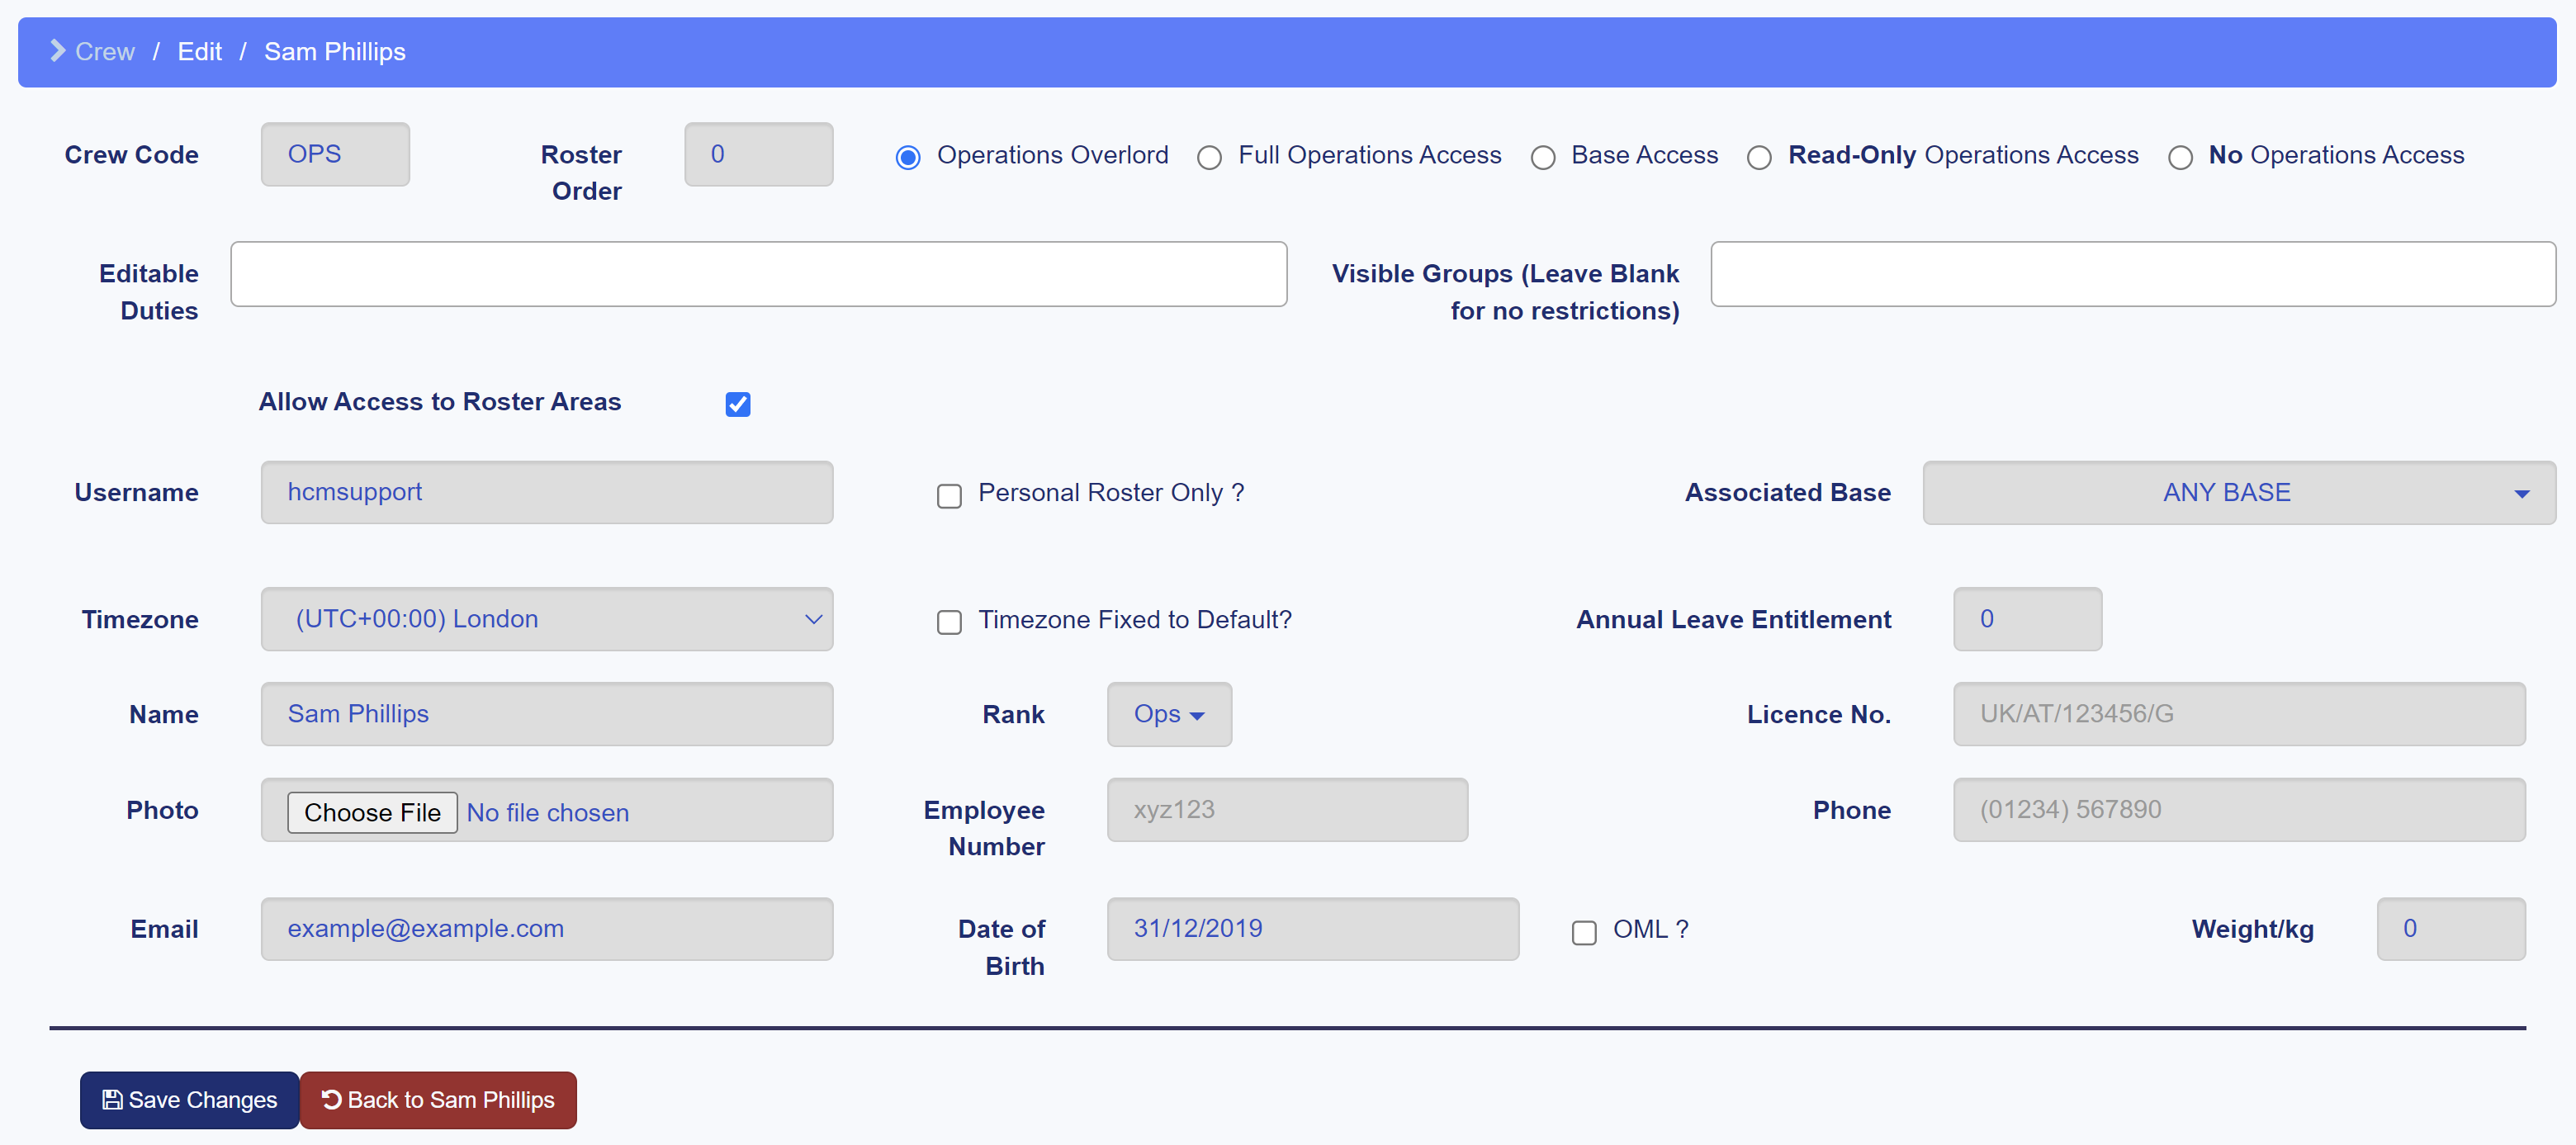
Let's head into the Edit control, which takes us to this page in the image below.

This provides you with essential data you can fill out for each user in your account - a full breakdown of these can be found below in Viewing and editing existing users, but let's set up the default account with just what's essential to get you started.
Essential information for a user to be integrated with HCM's systems is as follows:
- Crew Code - A short unique code to easily identify a user in places like the roster page (we recommend this not being longer than 3 or 4 characters)
- Permission Level - Specifies the level of access to HCM's systems the user has - we don't reccommend changing this until you're happy your account is fully set up
- Username - A unique identifier for every user in the account, needed by the user to login to HCM
- Name - The user's full name - which may appear on relevant reports and certificates
- Rank - These are configurable, and denote what position the user holds in your operation. These will become important when grouping users, and for training purposes
- Email - If users have access to a work email with your operation, it's best to use this, as all Operation Communications (OPSCOMS) will usually be routed to this email when there's a change. Other important notifications will be sent here too
- Date of Birth - It's important that this is accurate, especially in cases where an Operational Multi-crew Limitation (OML) is present
Details like the Crew Code and Username are fully configurable by the admins of an operation's HCM account - but we recommend having a consistent naming convention for both of these.
If you have two pilots in your operation, Checo Sainz and Jenson Mansell, you could take their first initial and the first three letters of their surnames to create the crew codes CSAI and JMAN, and their first inital again with their full surnames and birth year to create the usernames csainz94 and jmansell53.
Once your details are successfully updated, you now have an account ready to integrate with the other parts of HCM. However, you won't get the most out of HCM until there's a few users added to the account.
Before we add some more users, it's a good idea to make sure all the ranks in your operation are added in the Edit Ranks screen found in the Inspect Crew page. From this page, select the New Rank button at the top-right to start adding your own ranks. This is very easy to do, and only requires you to add a name and trainer type (which are defined by HCM and will be explained further later) to each addition.

Now you have one user and your ranks set up, you should be able to quickly add several more users quickly.
Adding new user accounts
We recommend adding 3-4 more users to manage (even more is better!) with your operation's account to get the best experience learning to use HCM.
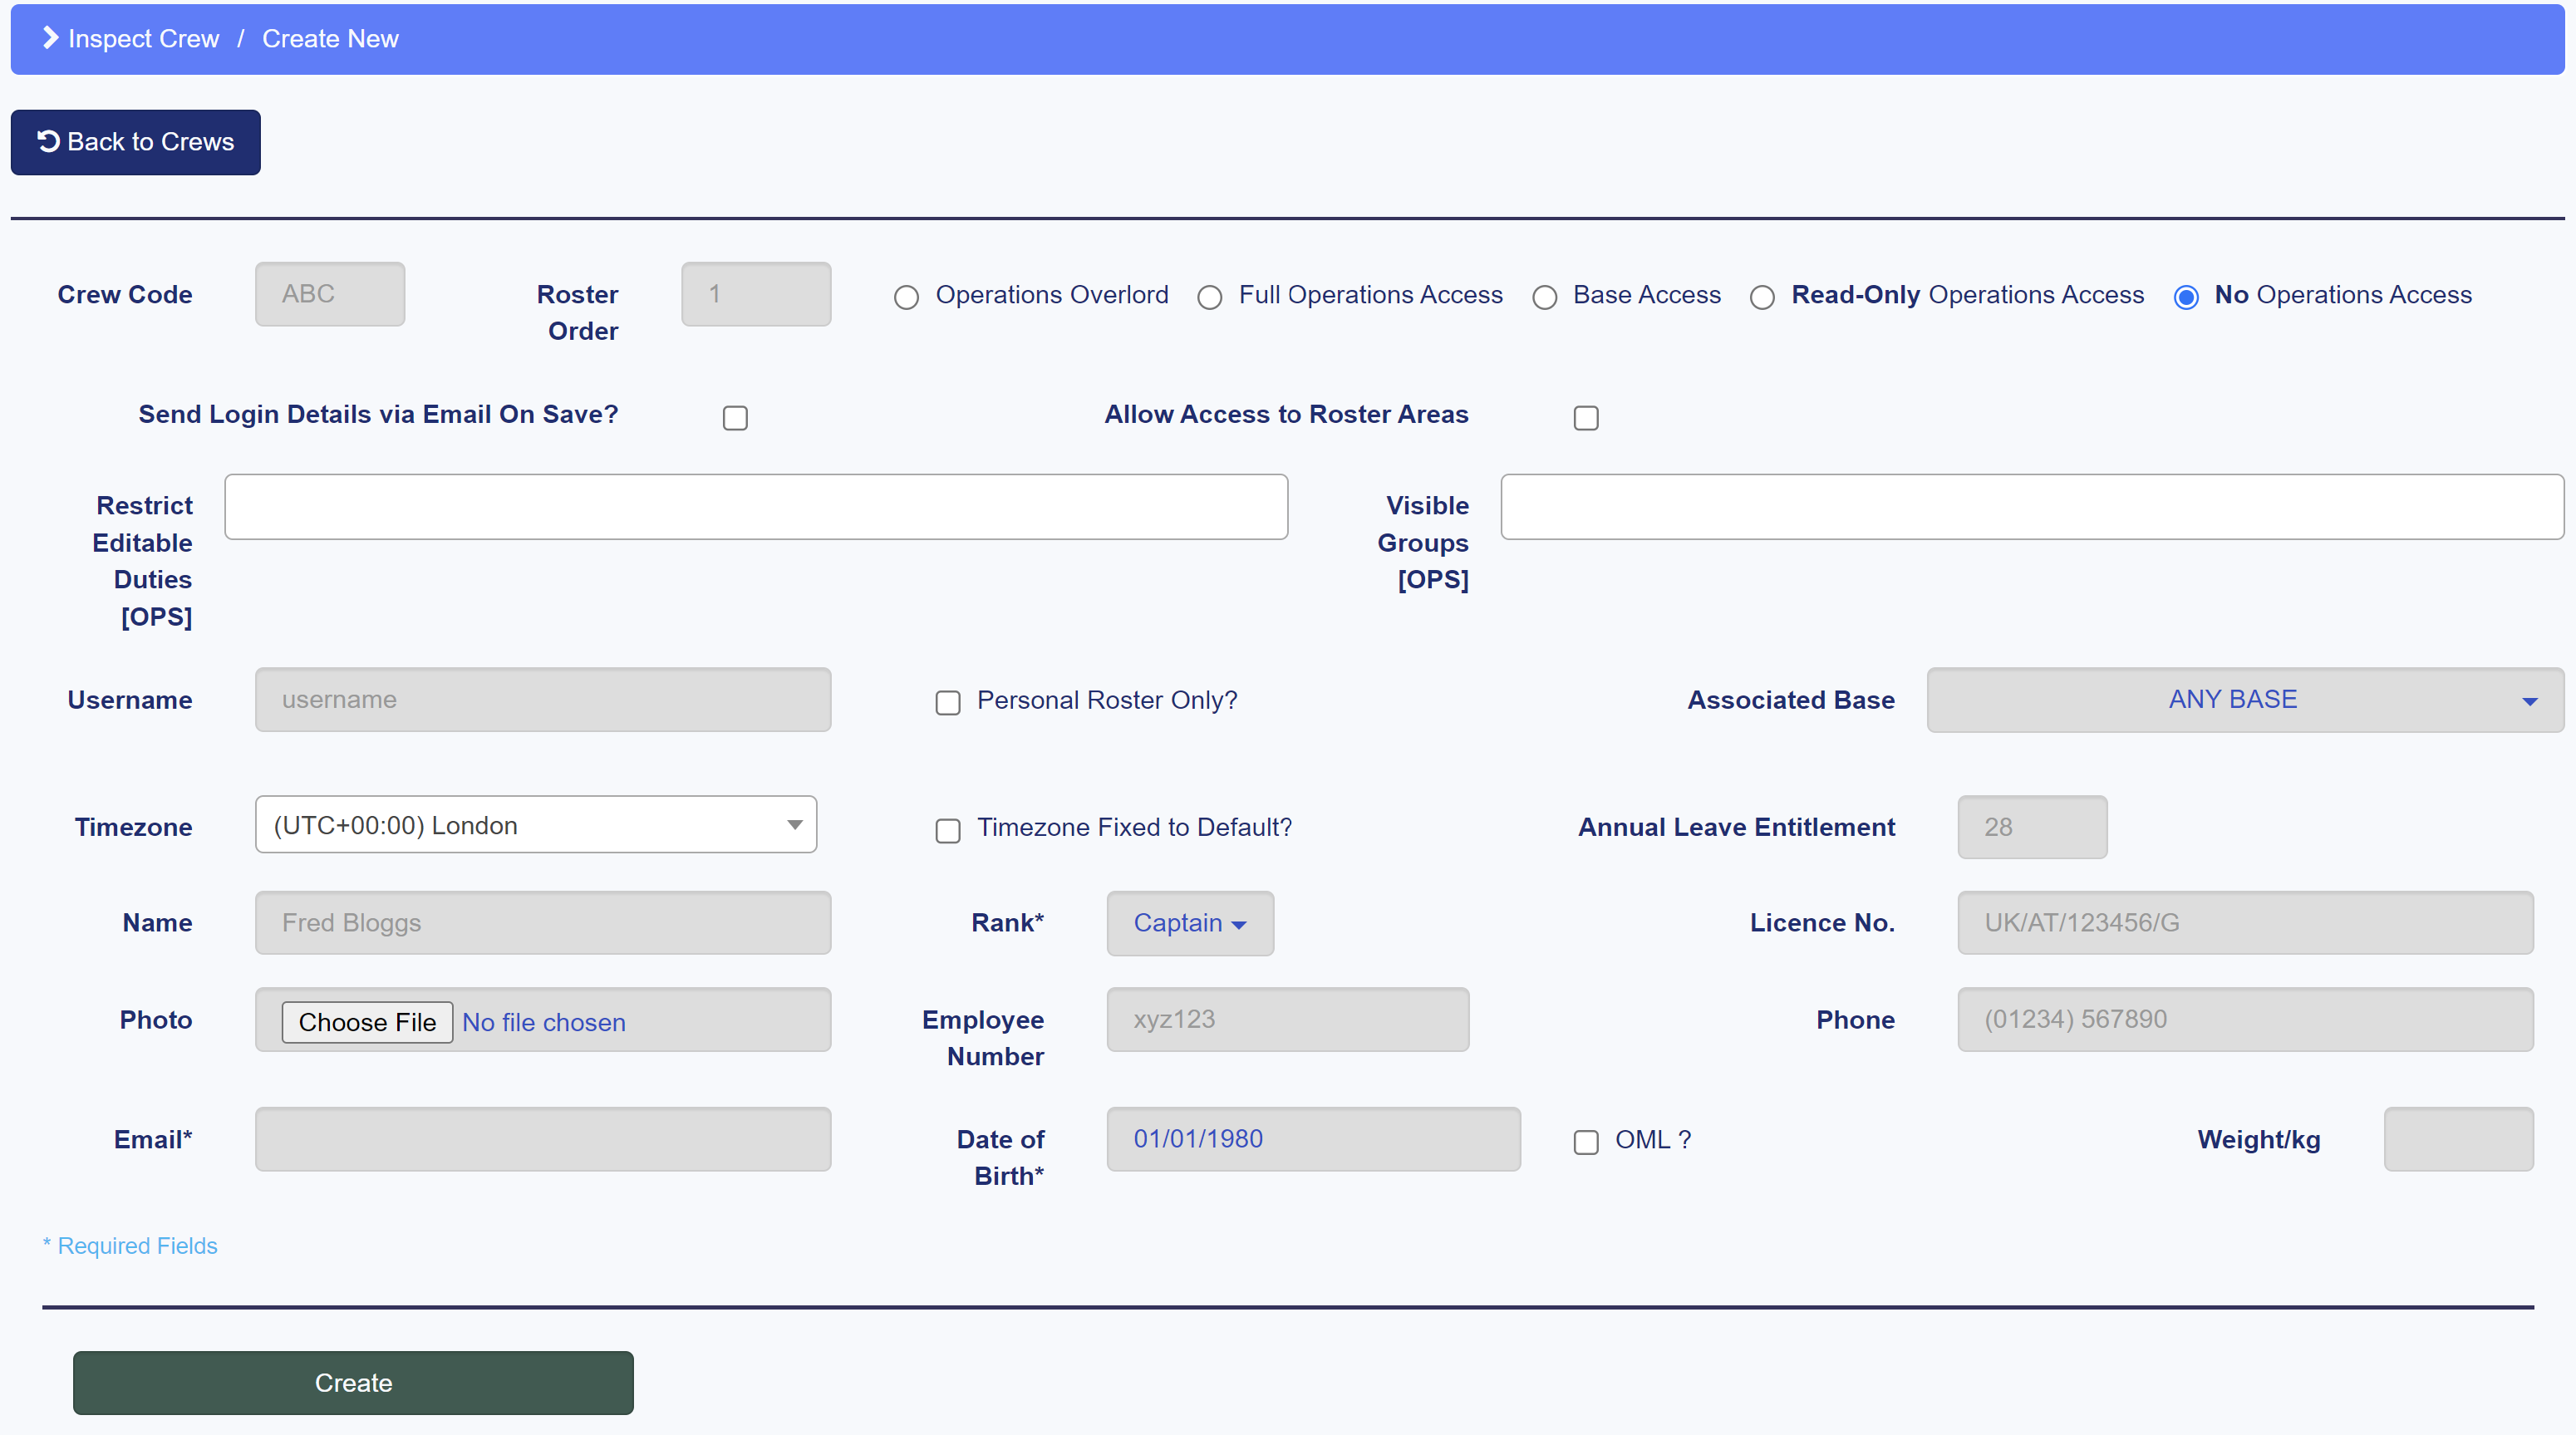
To do this, you can navigate back to the Inspect Crew page and select Create New User in the top-left. This will take you to a new page similiar to the Edit screen for a specific user.

Here you can replicate the process for populating the default account with the essential details, selecting the appropriate rank and permission for each user.
There's one major difference between this screen and the Edit screen, and that's the checkbox marked Send Login Details via Email On Save?.
Selecting this will make sure this new user will receive their login through the email address you assign them when creating them.
This will also generate a hashed password for temporary use, and allow them to access the HCM system with whatever permissions you granted them.
Giving another user overlord access to your HCM account results in allowing them to login and change all the permissions and configurations of the account with no restrictions, so make sure they're a trusted user (and ideally route them to this help site).
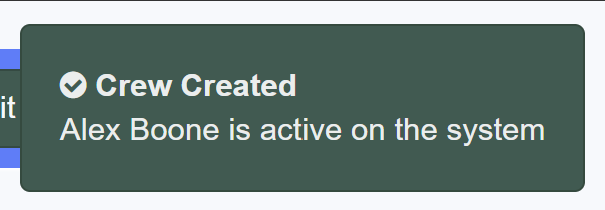
Once you've clicked Create, you should be returned to the Inspect Crew page , and a message should appear onscreen telling you that the process was successful.

Viewing and editing existing users
Now, you should have several users set up with the essential information needed to get you started with HCM. When you navigate back to the Inspect Crew (x) (where x is the total amount of users registered on your account) in the sidebar, you can now search for and edit existing users.

Using the Type to Search Crew ... search bar at the top of the page, you can look for a specific user profile with characters in their name, and select from a dropdown list.

Now, as before - you can select the Edit button and update their details if and when you need to.
If you're changing a user's details that may impact their ability to login (e.g. their username or email), you will need to let the user know that their details have changed so they can log in after you save your changes.
You can do this manually of course, or when you've made your edits, navigate to Password and then Resend Login Email and HCM will automatically send an update to the email associated with the user.

You've now completed the most important part of HCM - creating the users you will be managing across the rest of the system. Now that they're in place, we need to establish things for them to do through rulesets and duty templates in the next guide.